Task Six
Step 1: Open User Account Settings
Log in to your Windows 11 system using an account with administrative privileges.
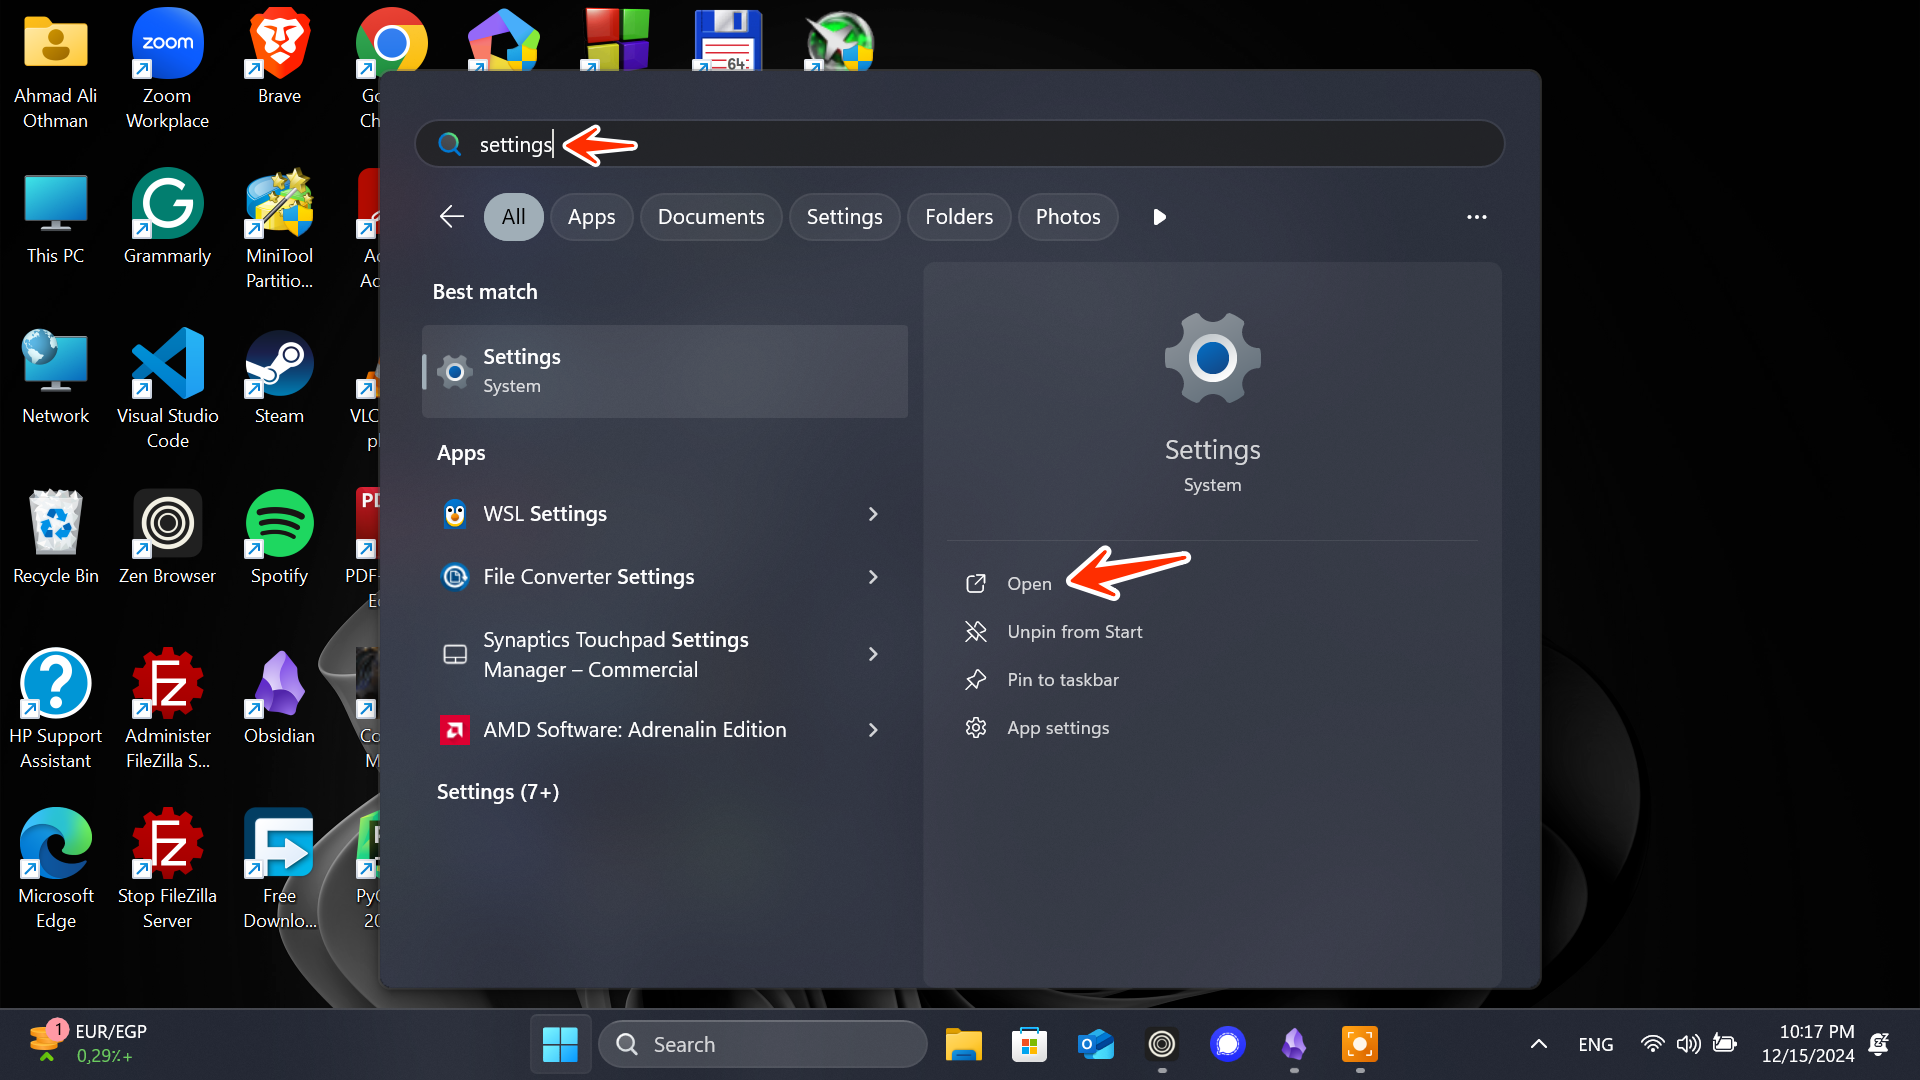
Press
Win + Ito open the Settings app or search for it in the start menu.
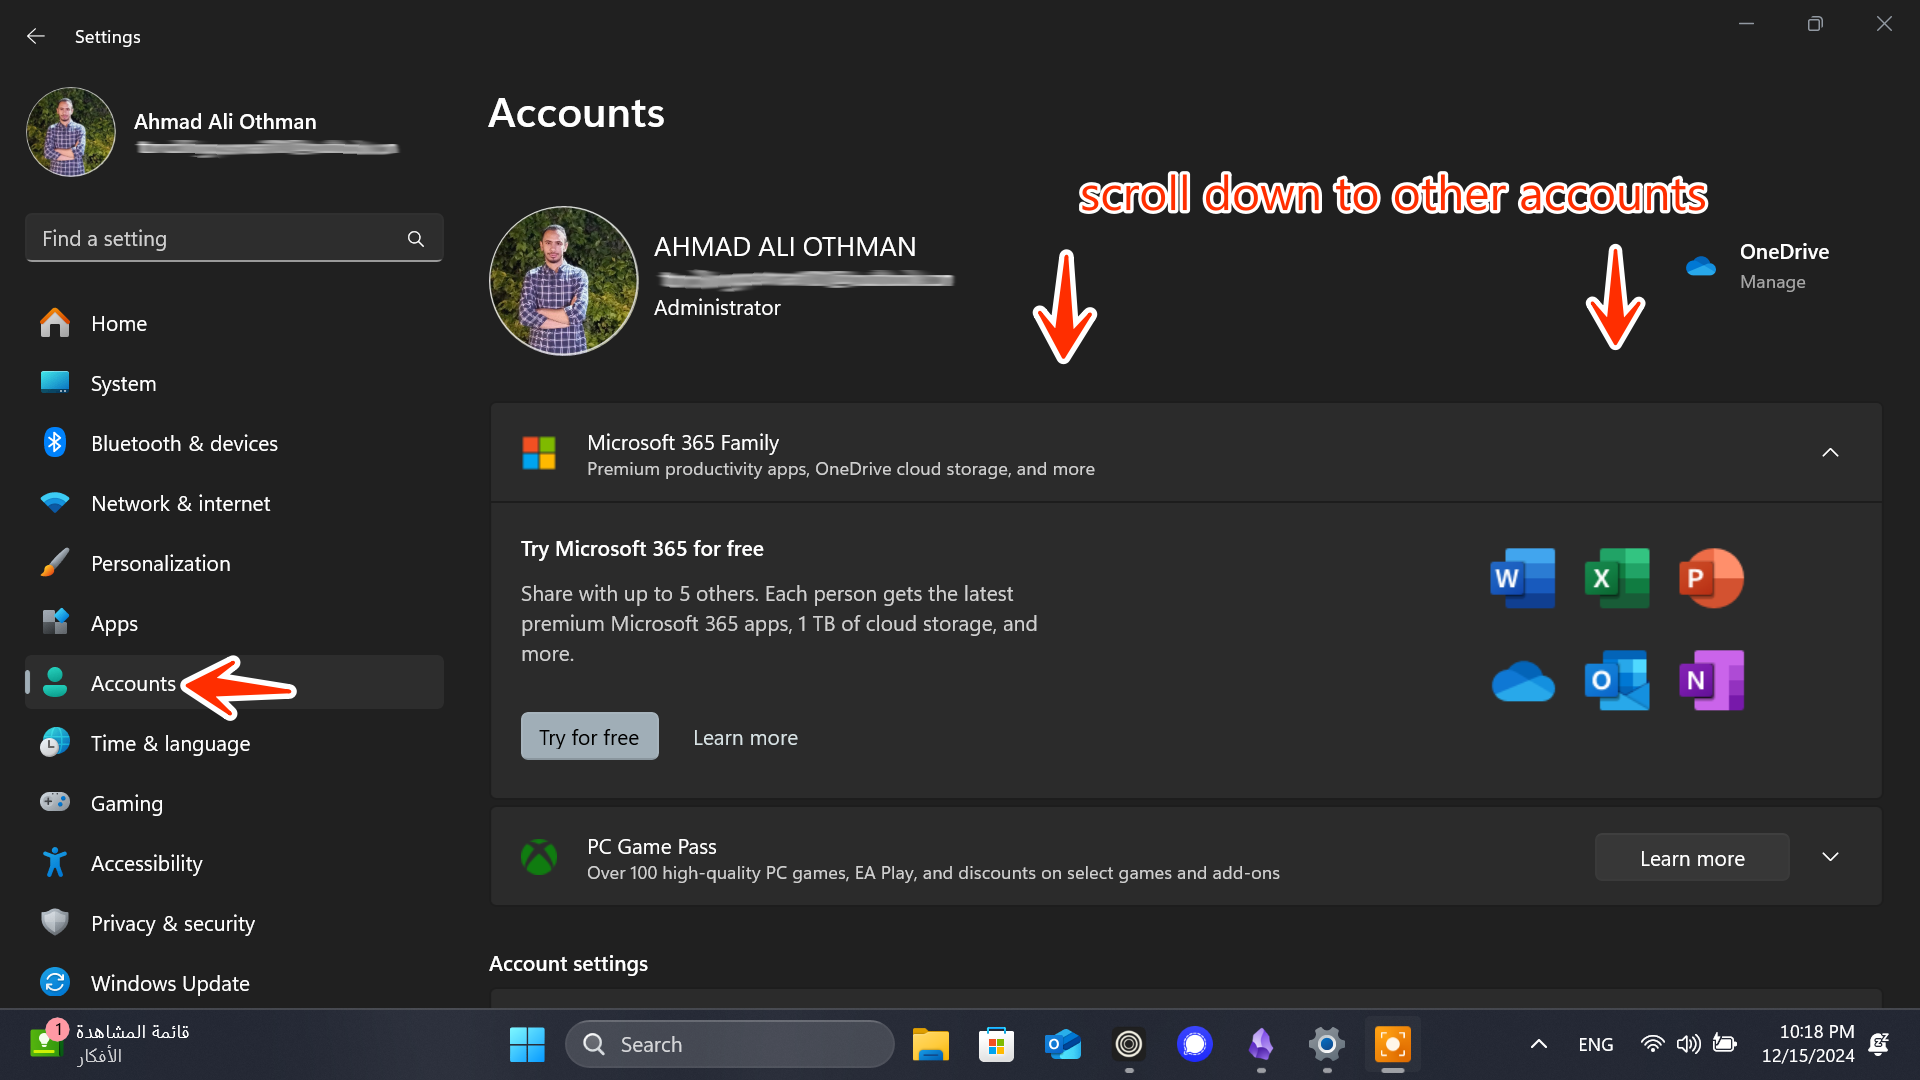
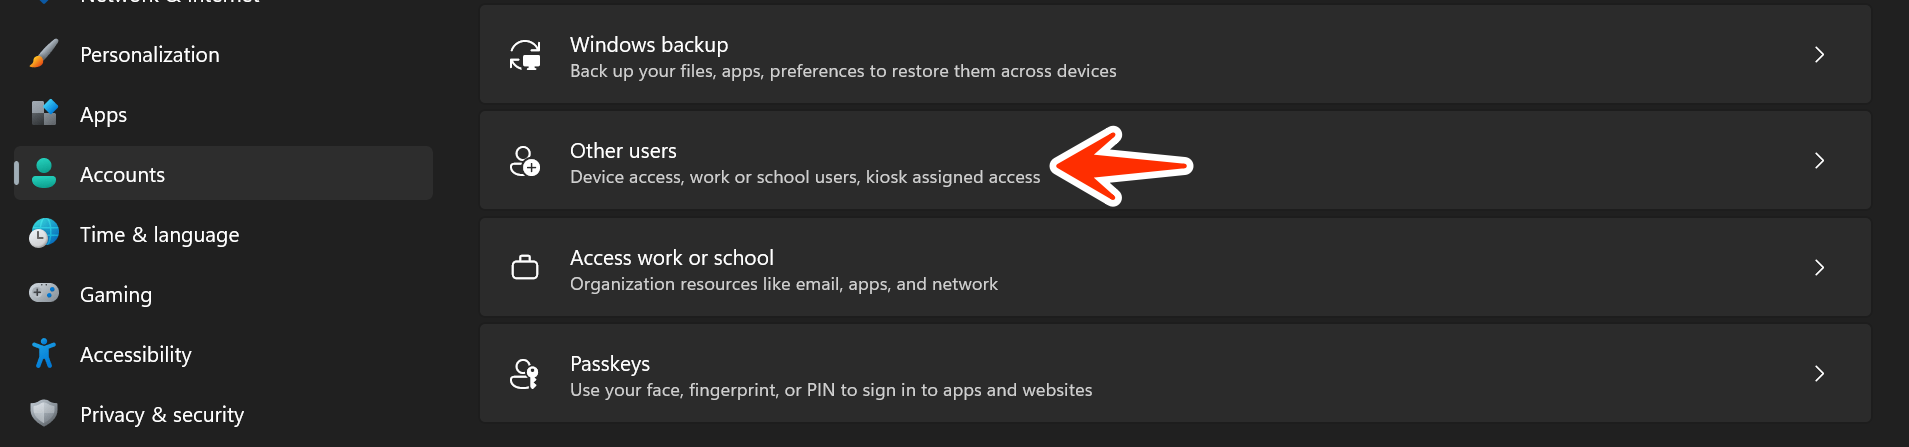
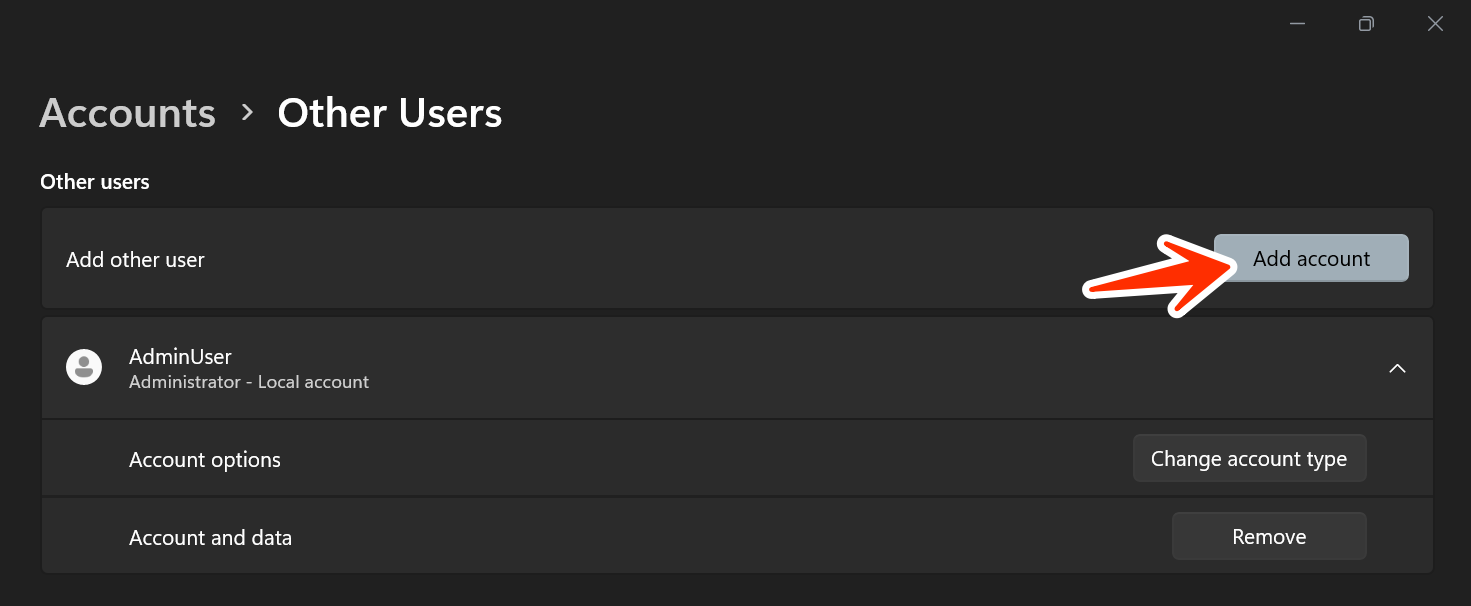
- In the Settings window, go to Accounts -> Other users.
Step 2: Create the "AdminUser" Account with Administrative Rights
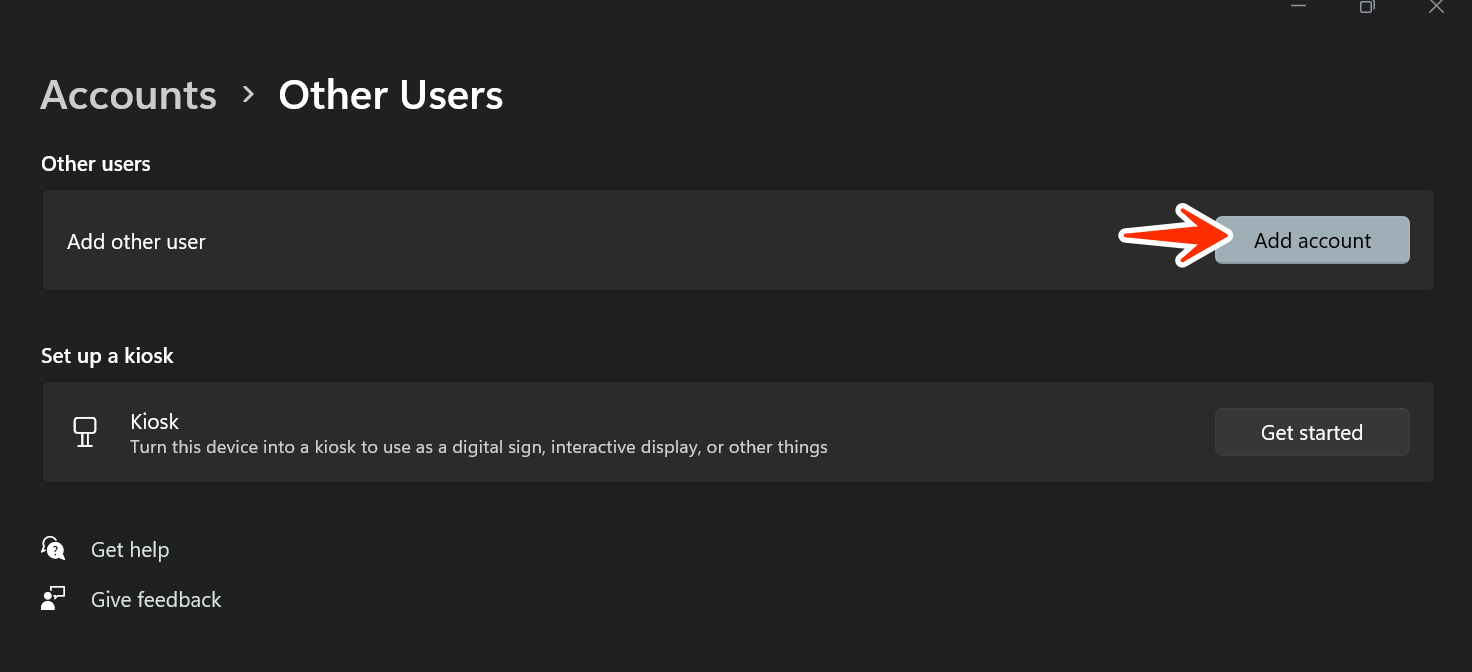
Under the Other users section, click Add account.
In the pop-up: - Select I don't have this person's sign-in information.
 - Then click Add a user without a Microsoft account
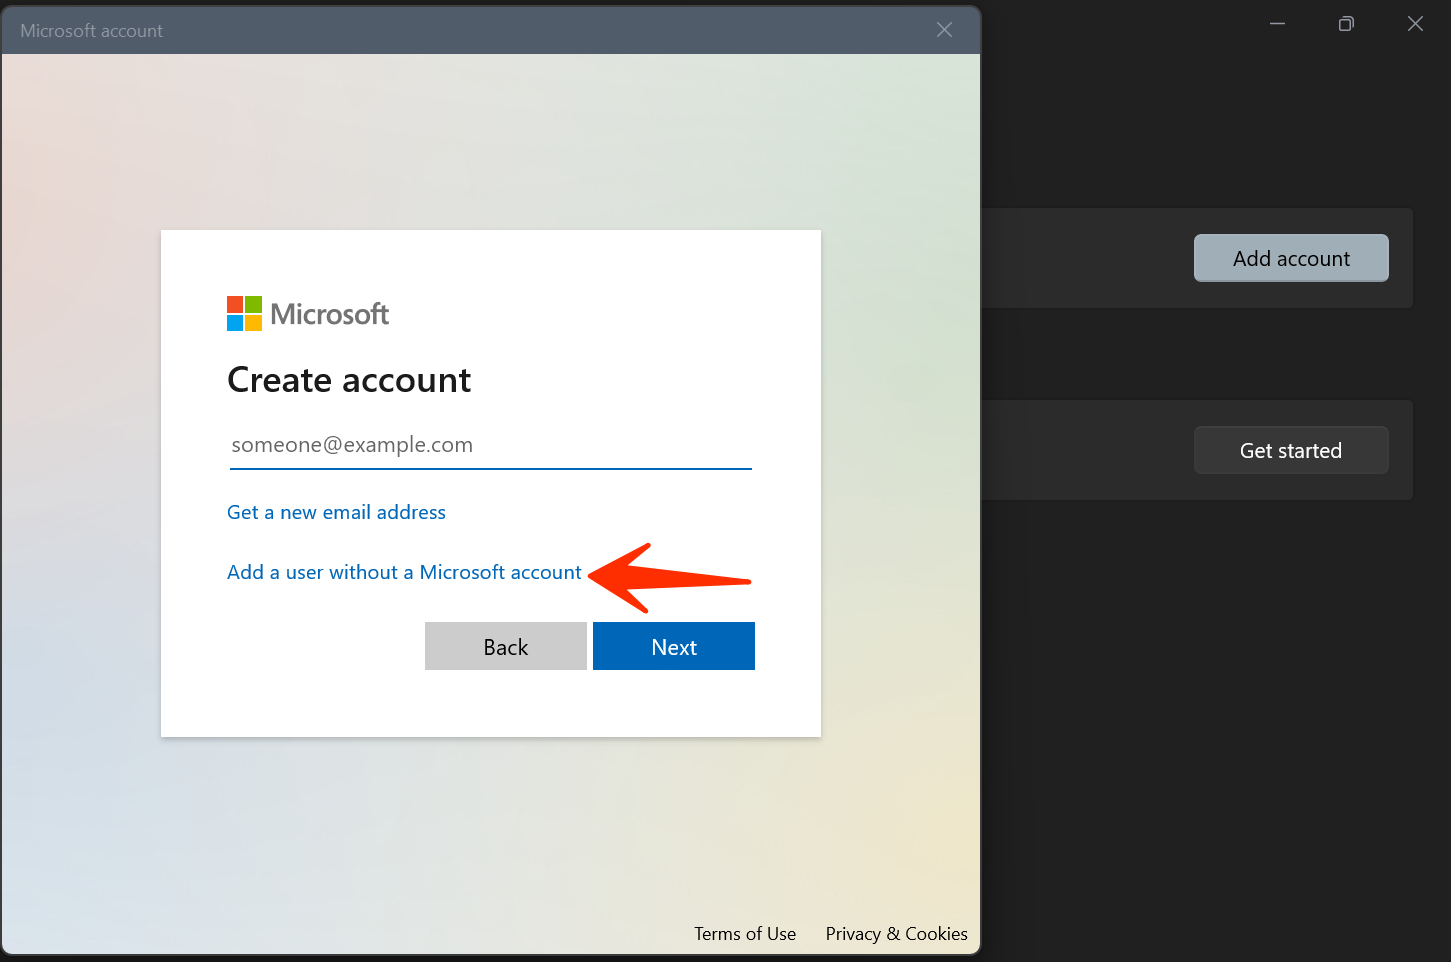
Enter the following details: - Username:
AdminUser- Password: Use a strong password likeP@ssw0rd123!. - Confirm the password. - Set up security questions (for password recovery).
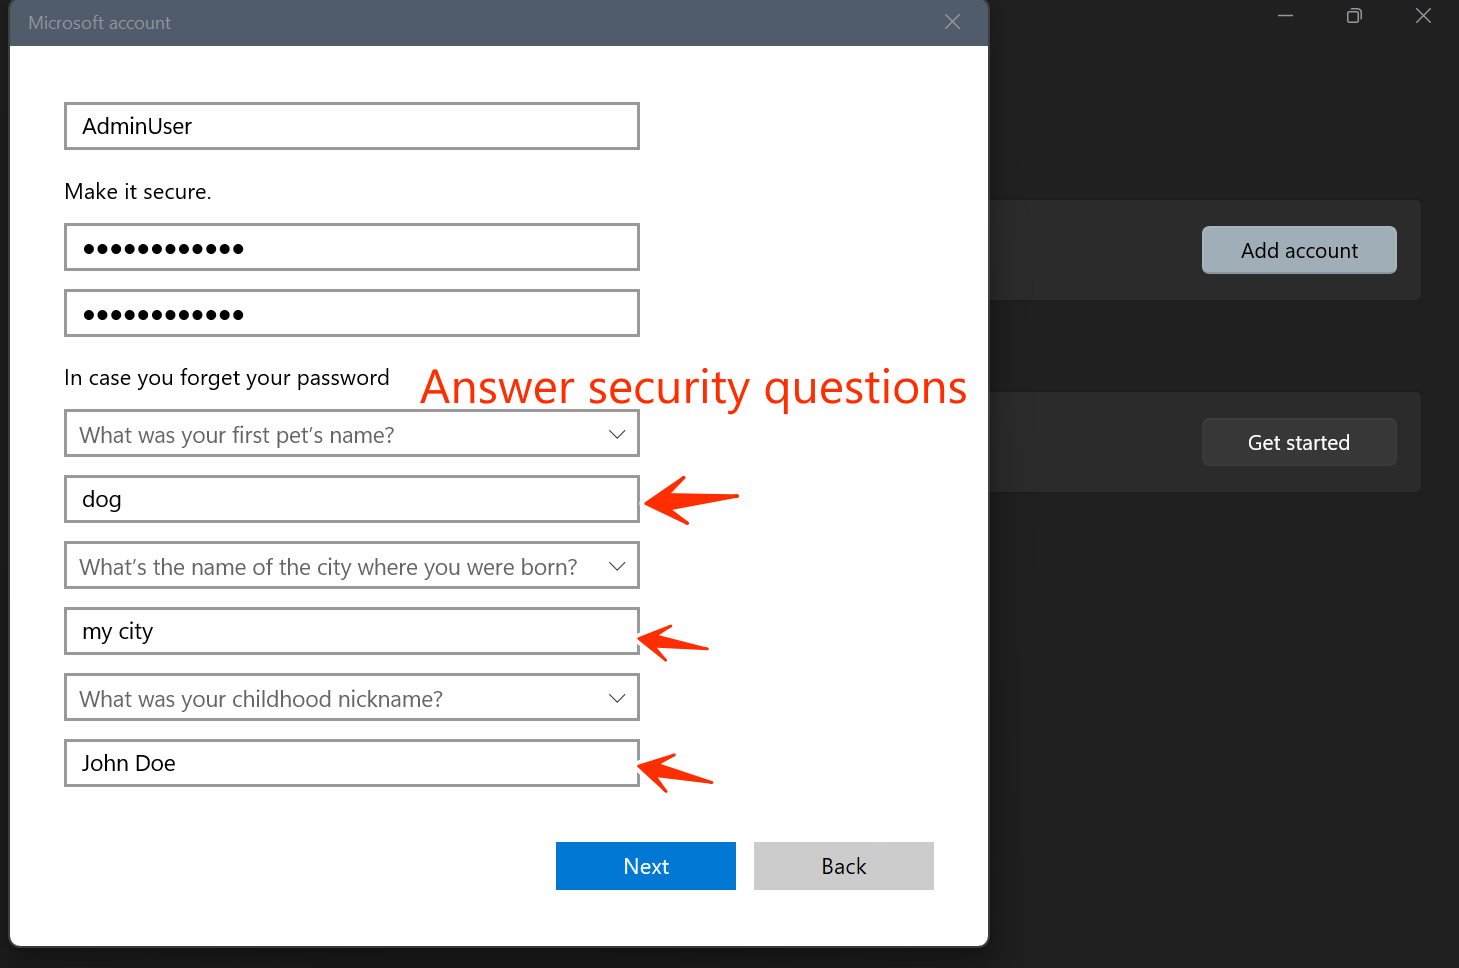
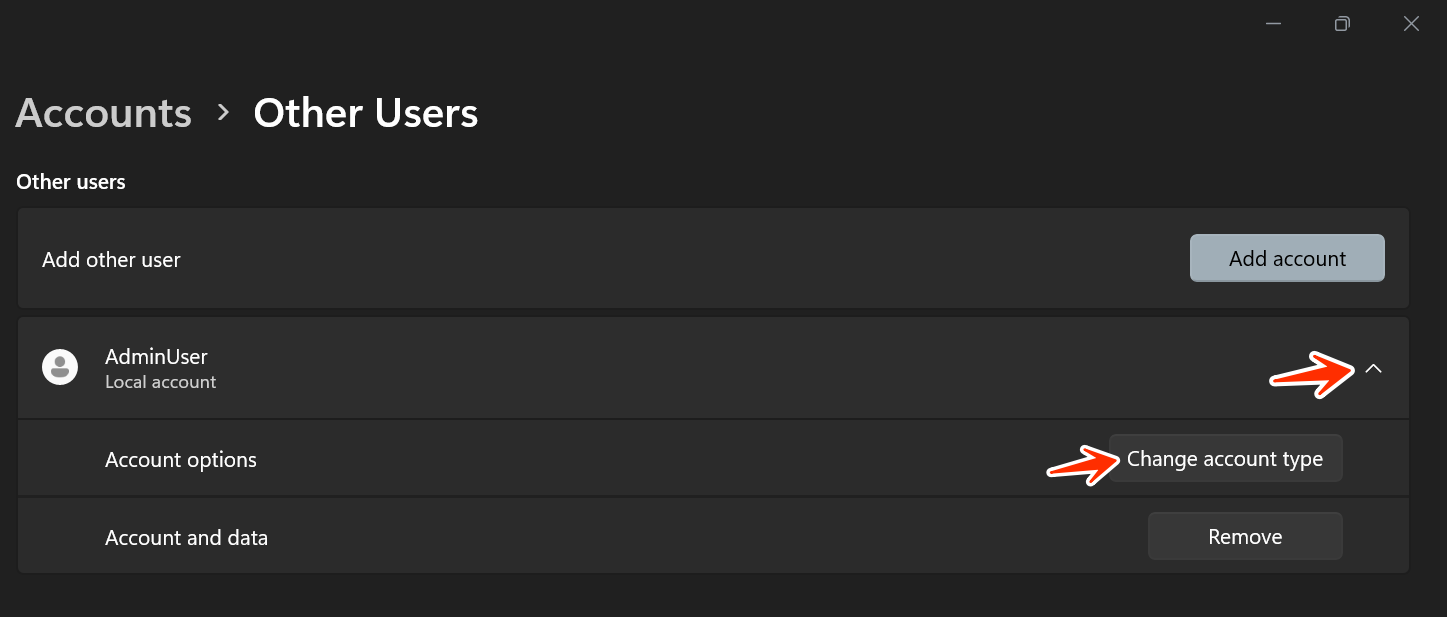
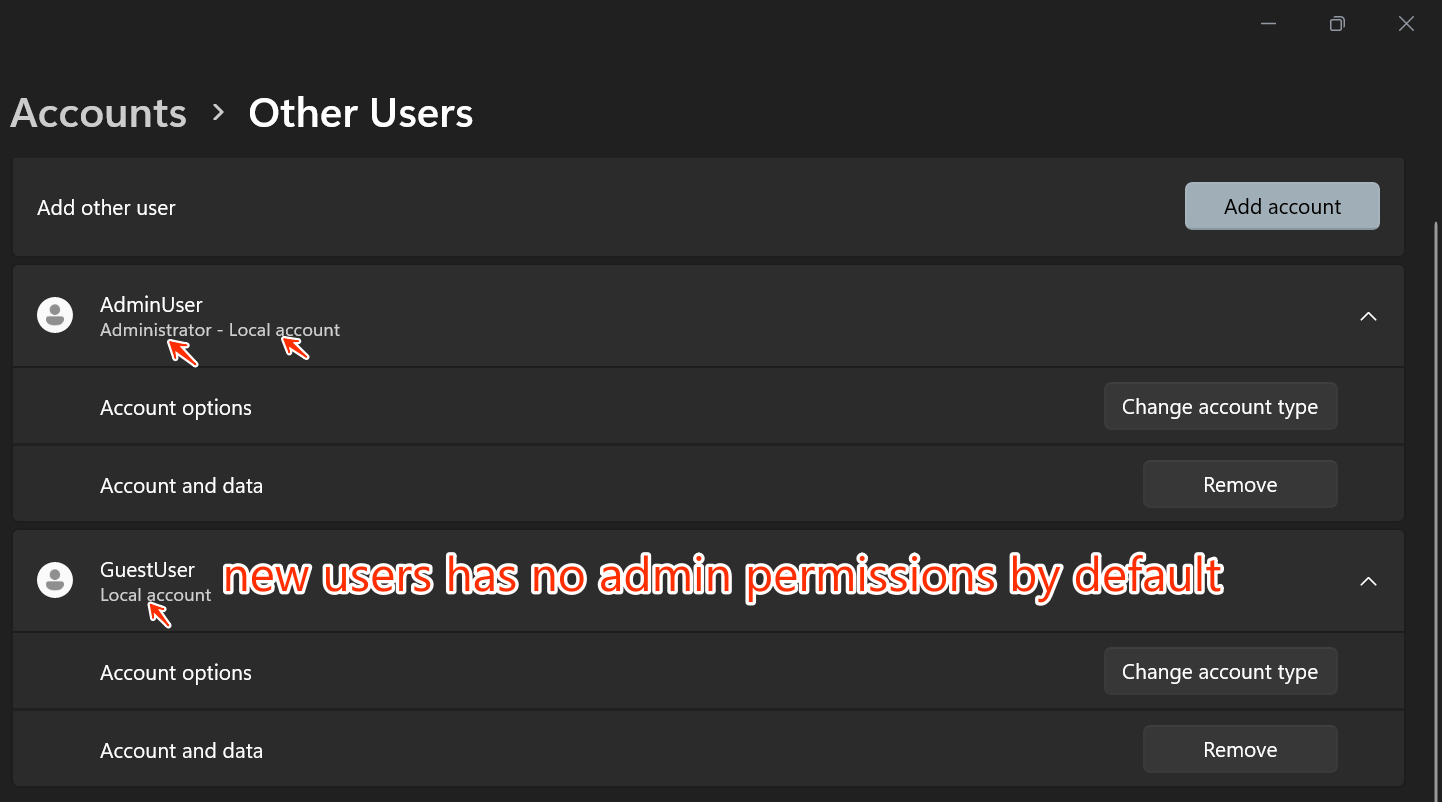
Once the account is created, it will appear under "Other users".
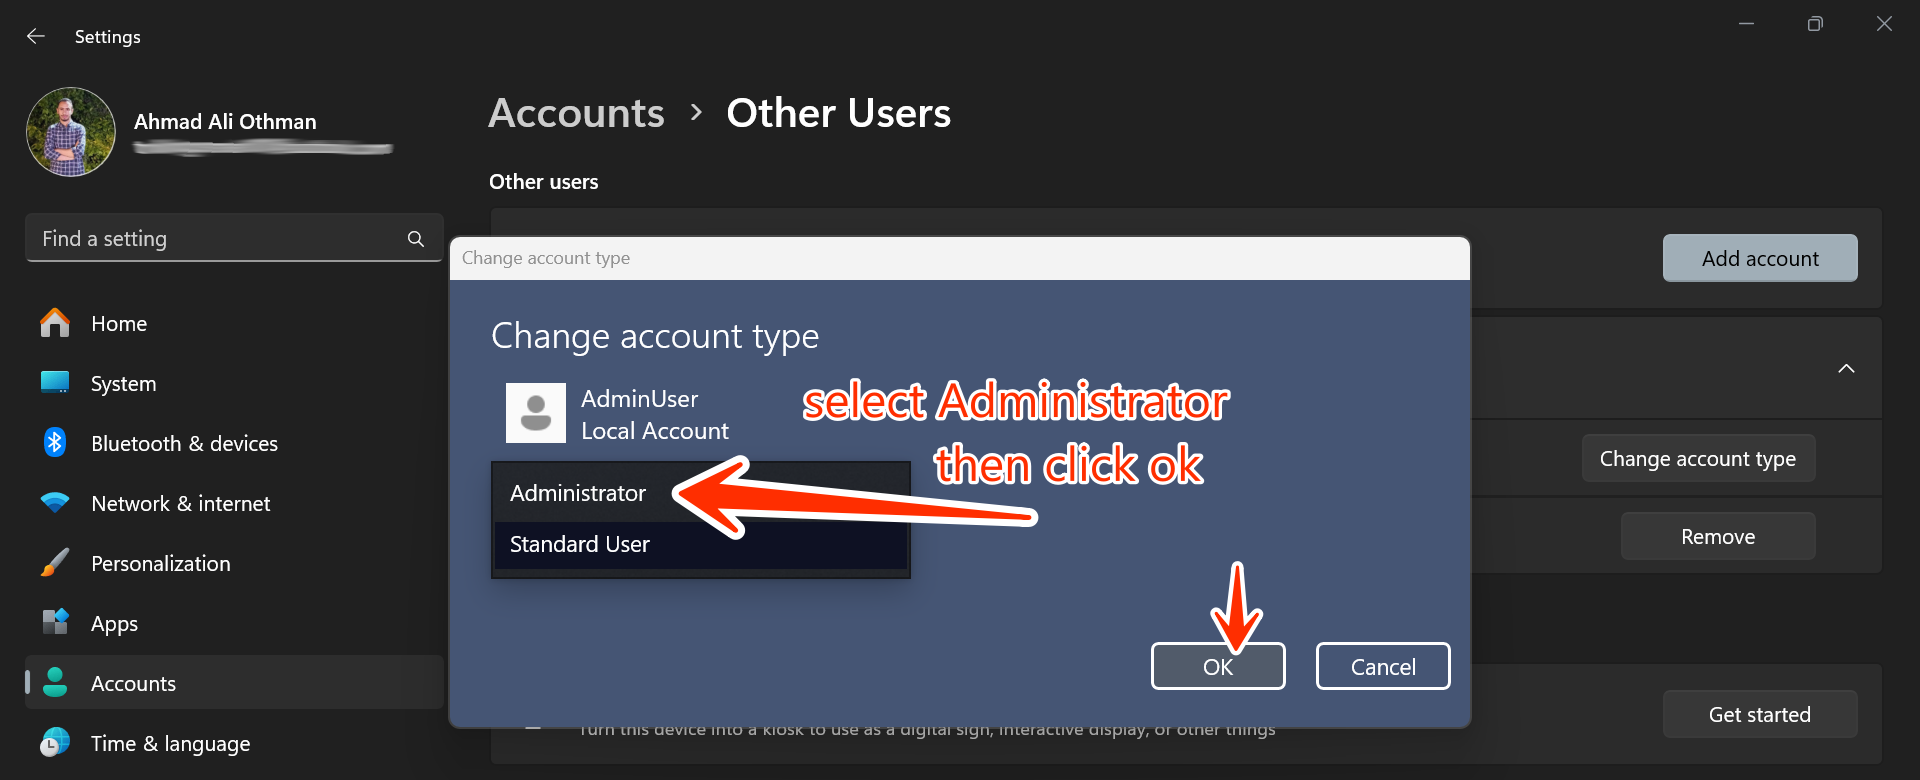
Change the account type to Administrator:
Click on the newly created
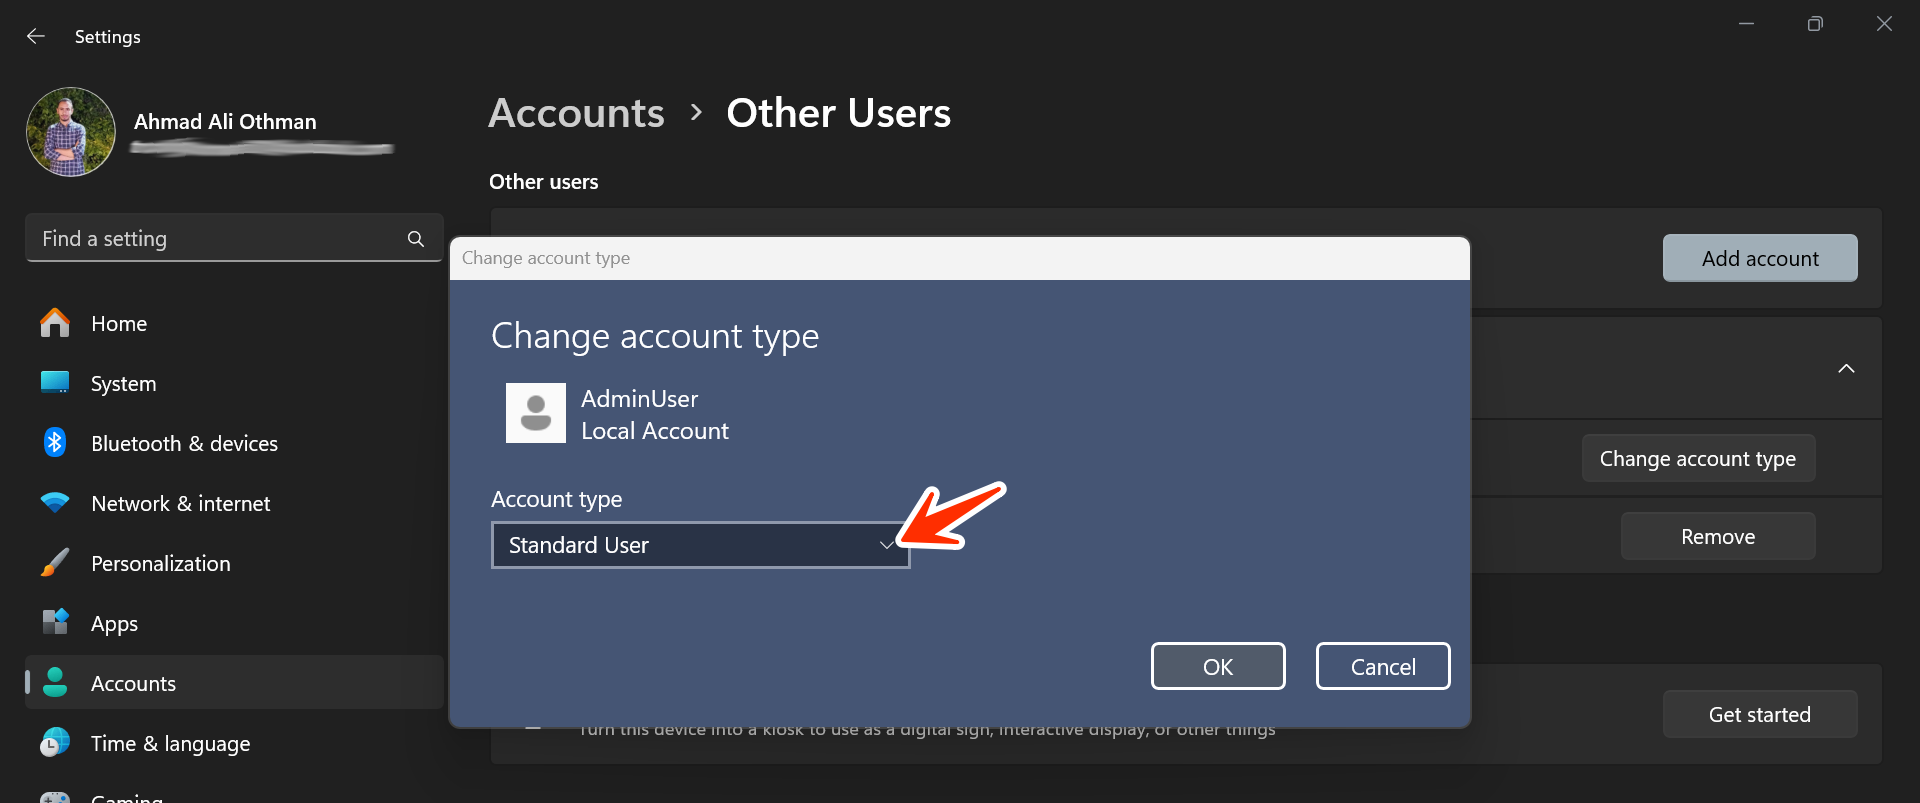
AdminUseraccount.Select Change account type.
In the dropdown menu, choose Administrator.
Click OK to save changes.
Step 3: Create the "GuestUser" Account with Limited Permissions
- Under Other users, click Add account again.
- Follow the same steps: - Select I don't have this person's sign-in information. - Choose Add a user without a Microsoft account.
- Enter the following details: - Username:
GuestUser- Password: A simple password like1234. - Confirm the password and set the security questions.
 - By default, GuestUser will be created as a Standard User.
Summary
- AdminUser: Has full administrative rights—can install applications, manage settings, and access system files.
- GuestUser: A standard user with limited permissions—restricted from installing applications or changing system settings.